

Blog
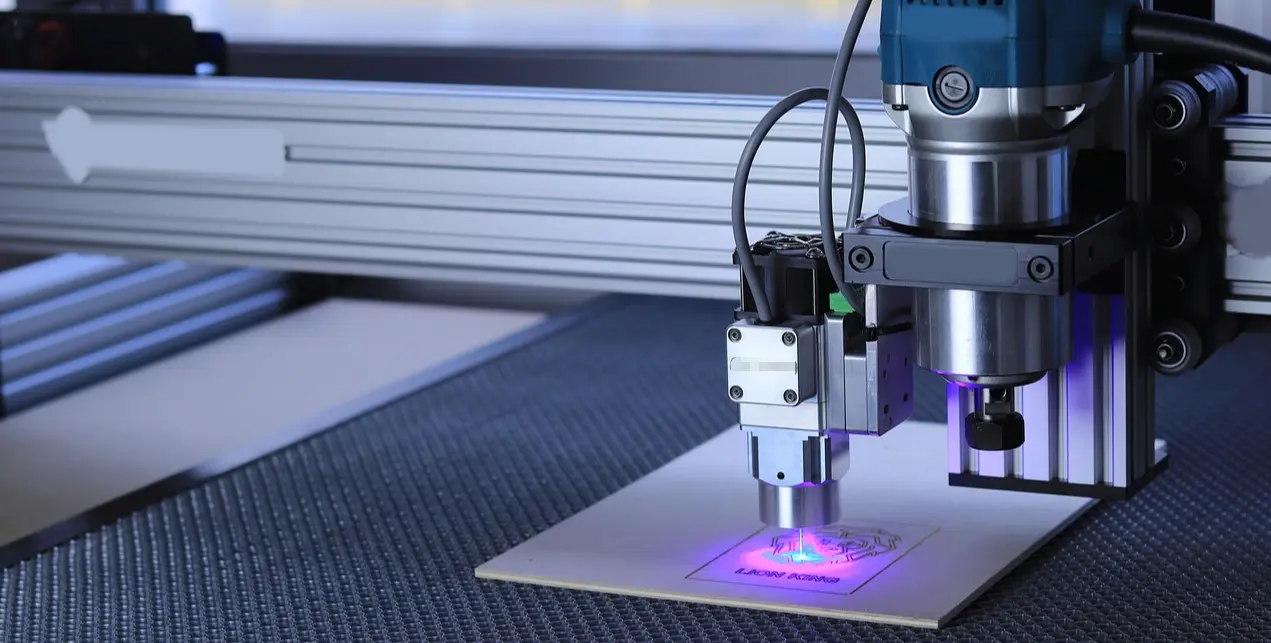
UV Laser Marker for Furniture Metalwork | OEM Manufacturer

UV Laser Marker for Furniture Metalwork | OEM Manufacturer
Most compact UV units are air-cooled, not water-cooled, yet dust remains the primary killer of optical precision.
Successful deployment of a UV laser marker for furniture metalwork hinges on three non-negotiable pillars: precise vibration isolation during installation, rigorous weekly lens maintenance to prevent power degradation, and accurate HS code declaration specifying wavelength and function to avoid customs detention.
I still recall the silence in the warehouse when a shipment of high-end stainless steel table legs arrived from Qingdao port, not with the expected gleam of crisp OEM logos, but with faint, blurred etchings that looked like ghosting. The client had lost days in customs because the declaration simply read "laser machine," triggering a manual inspection that held the container for nearly a week. The technical failure was equally costly: misalignment caused by inadequate leveling led to a deviation measured in millimeters, forcing a complete rework of the batch. These incidents were not bad luck; they were the result of overlooking the specific physical and regulatory requirements of ultraviolet marking technology. Unlike fiber lasers that melt material, UV lasers break molecular bonds through cold ablation, a process that demands exceptional stability and cleanliness [NEED_CITE: fundamental principles of UV cold ablation vs thermal melting].
Understanding these nuances transforms the UV laser marker from a risky import into a reliable production asset. The following guide details how to navigate the installation, maintenance, and compliance landscape effectively.
Why Does Your UV Laser Marker Fail Customs?
Vague descriptions like "laser marker" trigger automatic holds; specificity in wavelength and application is your clearance ticket.
Customs officers are not optical engineers. When they see a generic description, they default to caution, often classifying the equipment under broader, higher-tax categories or detaining it for expert verification. The critical error lies in omitting the defining characteristics of the technology. A UV laser marker operates at a specific wavelength, typically 355nm, which distinguishes it fundamentally from fiber (1064nm) or CO2 (10600nm) systems. This distinction is not merely technical; it dictates the Harmonized System (HS) code and the associated duty rates.
A European distributor once faced a significant delay because their commercial invoice listed the item as "industrial marking equipment." The local customs authority paused the release to determine if it fell under cutting machinery or marking machinery, two categories with different regulatory frameworks. The resolution required submitting technical datasheets proving the device’s function was surface marking without material removal via melting. To prevent this, the declaration must include three key elements: the light source type (UV), the specific wavelength, and the primary function (marking/engraving).
| Declaration Element | Risk Level | Recommended Specificity |
|---|---|---|
| Product Name | High | UV Laser Marking Machine |
| Light Source | Critical | Solid-state UV Laser, 355nm |
| Function | High | Surface marking on metal/plastic |
| Power Output | Medium | Exact wattage as per nameplate |
This level of detail aligns with international classification rulings that emphasize the method of operation over general utility [NEED_CITE: WCO guidelines on laser equipment classification]. By providing this clarity upfront, you remove the ambiguity that leads to inspections. The goal is to make the classifier’s job easy, ensuring your UV laser marker for furniture metalwork moves through the port without unnecessary friction.
How to Install for Maximum Precision?
Vibration isolation is more critical than power supply stability for maintaining micron-level focus on curved metal surfaces.
Furniture metalwork often involves curved surfaces, such as chair legs or table frames, where the focal distance must remain constant to ensure uniform mark depth. Any vibration during the marking process causes the laser beam to defocus, resulting in inconsistent line widths or incomplete ablation. While many operators focus on electrical grounding, they neglect mechanical stability.
The installation process begins with selecting a location free from heavy machinery traffic. Even minor floor vibrations from nearby forklifts or stamping presses can transfer through the workbench. Use a spirit level to ensure the base is perfectly horizontal; a tilt of even a fraction of a degree can shift the focal point across the field of view. Next, secure the unit to a heavy, dampened workbench. If possible, install rubber vibration isolators between the machine feet and the table.
- Level the Base: Adjust the feet until the bubble is centered in both axes.
- Isolate Vibrations: Place anti-vibration pads under the machine feet.
- Check Optical Alignment: Use a test card to verify the beam path is perpendicular to the work surface.
- Set Focal Distance: Measure the exact distance from the lens to the workpiece using the manufacturer’s gauge.
A case from a Southeast Asian factory illustrated this point vividly. They installed their new UV system next to a large cutting press. Despite perfect software settings, the logos on their stainless steel accents appeared jagged. Moving the unit to a quiet corner of the workshop and adding isolation pads resolved the issue immediately. The stability of the optical path is paramount for the UV laser marker to perform its cold ablation function correctly [NEED_CITE: impact of mechanical vibration on laser beam quality].
What Maintenance Prevents Power Loss?
Metal dust is invisible to the naked eye on lenses but catastrophic for UV transmission; weekly cleaning is mandatory.
UV lasers are particularly sensitive to contamination. The short wavelength means that even a microscopic layer of dust or oil on the focusing lens can absorb a significant portion of the energy, leading to rapid power loss and potential lens damage. Unlike fiber lasers, which are more robust against minor contamination, UV optics require a disciplined cleaning routine.
The environment around furniture metalwork is often dusty, especially if grinding or polishing occurs nearby. It is crucial to enclose the marking area or use an air knife to blow debris away from the lens during operation. However, passive protection is not enough. Active maintenance must be scheduled.
- Daily: Inspect the protective window for visible splatter. Replace if necessary.
- Weekly: Clean the focusing lens with approved optical cleaning solution and lint-free wipes. Use a circular motion from the center outward.
- Monthly: Check the air filters on the cooling fans. Clogged filters reduce airflow, causing thermal drift in the laser source.
A manufacturer in the Middle East reported a gradual decline in mark contrast over six months. They assumed the laser source was degrading. Upon inspection, the focusing lens was coated with a fine layer of metallic dust that had baked onto the surface due to heat. After professional cleaning, the power output returned to near-original levels. This highlights that perceived hardware failure is often a maintenance issue. Regular care extends the service life of the UV laser marker significantly and ensures consistent quality [NEED_CITE: maintenance best practices for UV optical components].
How to Troubleshoot Common Marking Issues?
Blurring is rarely a software error; it is almost always a focal distance or speed mismatch.
When marks appear blurry or shallow, the instinct is to adjust the power settings in the software. However, increasing power on a defocused beam only increases the spot size, making the mark wider and less defined. The root cause is usually physical: the workpiece is not at the correct focal distance, or the marking speed is too high for the given power level.
First, verify the focal distance. Use the provided gauge or a manual measurement tool to ensure the distance between the lens and the material matches the specification. For curved furniture parts, consider using a rotary attachment or a specialized jig to maintain a constant distance. Second, review the marking parameters. UV lasers have a lower average power compared to fiber lasers, so they require slower speeds for deep engraving. If the speed is too high, the laser does not dwell long enough to break the molecular bonds effectively.
| Symptom | Likely Cause | Corrective Action |
|---|---|---|
| Blurry Edges | Incorrect Focus | Re-measure and adjust focal distance |
| Shallow Mark | Speed Too High | Reduce marking speed or increase frequency |
| Inconsistent Depth | Uneven Surface | Use a fixture to level the workpiece |
| Burnt Appearance | Power Too High | Reduce power; UV should be cold ablation |
A US buyer once struggled with faint logos on anodized aluminum legs. They had increased the power to maximum, causing discoloration rather than clean removal of the anodized layer. By reducing the power and slowing down the speed, they achieved a crisp, high-contrast mark without thermal damage. This adjustment leveraged the UV laser marker’s ability to process sensitive materials without heat affectation [NEED_CITE: parameter optimization for UV laser marking on anodized metals].
Conclusion
Precision in furniture metalwork is built on stability, cleanliness, and compliance.
Installing a UV laser marker requires attention to vibration isolation and leveling to ensure the optical path remains stable. Maintenance must be rigorous, with weekly lens cleaning to prevent power loss from dust accumulation. Finally, customs clearance depends on precise declarations that specify the UV wavelength and marking function. By adhering to these practices, manufacturers can avoid operational downtime and ensure their equipment delivers consistent, high-quality results.

