

Blog
Auto-Focus Laser Head Alignment & Calibration Standards Manufacturer

Auto-Focus Laser Head Alignment & Calibration Standards Manufacturer
Most operators treat laser alignment as a one-time factory setup, but vibration during transport and daily operation makes it a recurring maintenance task.
Precise auto-focus laser calibration is the single most critical factor in maintaining ±0.1mm cutting accuracy for CNC oscillating knife machines. Without strict adherence to Auto-Focus Laser Head Calibration Standards, even minor focus drift leads to burr edges on EVA foam, misaligned cuts in multi-layer leather, and significant material waste. The standard procedure involves cleaning the sensor lens, verifying the focal point with calibrated gauge blocks, and adjusting Z-axis offset parameters in the control software before every major production run.
I still remember the silence in the workshop when a client from Mexico unboxed his new vibrating knife cutter. He was producing automotive floor mats, a high-volume business where speed is everything. But instead of clean, sharp edges, the EVA material came out with ragged, burnt-looking burrs. The machine was mechanically sound, the blades were new, and the software was updated. The issue was invisible to the naked eye: the auto-focus laser had drifted by less than half a millimeter during ocean freight. That tiny deviation meant the oscillating knife was engaging the material at the wrong depth relative to the laser’s reference point. Recalibrating the system using proper protocols reduced his waste rate noticeably and restored the edge quality required for premium car interiors. This wasn’t a defect in the machine; it was a gap in the application of Auto-Focus Laser Head Calibration Standards.
Understanding why this happens requires looking beyond the blade. In digital die-less cutting, the laser does not cut the material; it maps it. It tells the oscillating knife exactly where the material surface is so the blade can penetrate to the precise depth needed. If the laser’s "zero" point is off, the entire cutting strategy fails.
Why Is Laser Head Alignment Critical for CNC Knife Cutters?
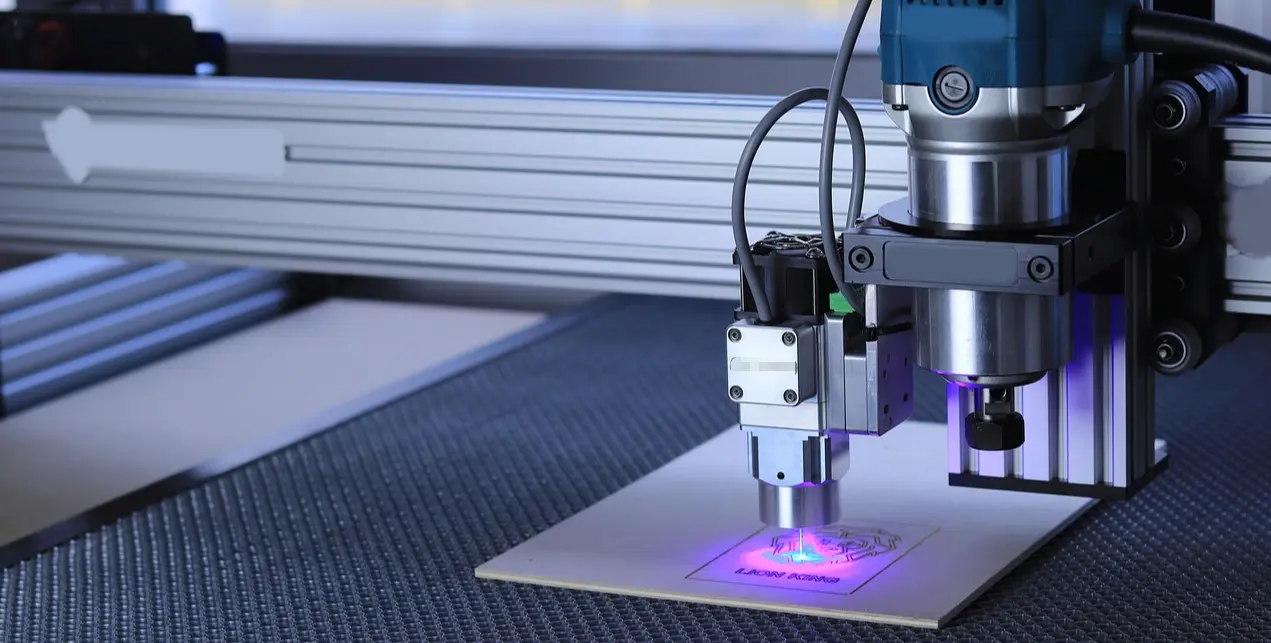
The relationship between the laser sensor and the oscillating knife is symbiotic. The laser measures the height of the material, accounting for wrinkles, thickness variations, and table unevenness. The knife then adjusts its Z-axis position in real-time based on that data. When alignment is compromised, the system operates on false data.
For manufacturers working with flexible materials like textiles, leather, or foam, consistency is non-negotiable. A misaligned laser head causes the knife to cut too shallow, leaving uncut fibers, or too deep, damaging the honeycomb table or the backing sheet. In the packaging industry, this results in cardboard prototypes that do not fold correctly. In apparel, it leads to fabric layers shifting or fraying.
[NEED_CITE: impact of focus drift on cutting precision in flexible material processing]
Consider the difference in outcomes based on calibration status:
| Calibration Status | Edge Quality | Material Waste | Tool Life |
|---|---|---|---|
| Properly Aligned | Clean, burr-free, consistent | Minimal | Extended |
| Slightly Drifted | Minor burrs, inconsistent depth | Noticeably increased | Reduced |
| Significantly Misaligned | Ragged edges, uncut sections | Substantially high | Rapid wear |
The cost of ignoring Auto-Focus Laser Head Calibration Standards extends beyond wasted material. It impacts throughput. Operators spend more time troubleshooting poor cuts, re-running jobs, and manually trimming errors. For a factory running multiple shifts, this downtime accumulates into a significant loss of productivity. Furthermore, frequent incorrect cutting depths accelerate the wear of oscillating knives and protective strips, increasing operational costs.
What Are the Standard Steps for Auto-Focus Calibration?
Calibration is not a complex engineering feat, but it demands discipline. Skipping steps or rushing the process is the primary cause of recurring issues. The following procedure outlines the core elements of Auto-Focus Laser Head Calibration Standards, designed to be performed by technical operators or factory managers.
- Power Down and Safety Check: Ensure the machine is in a safe state. While some checks can be done with the system on, initial physical inspections should occur with the head stationary and power isolated if necessary for cleaning.
- Lens and Sensor Cleaning: Dust, fabric fibers, and adhesive residue accumulate on the laser lens and sensor window. Use a lint-free cloth and appropriate optical cleaner. A dirty lens scatters the laser beam, causing inaccurate height readings. [NEED_CITE: maintenance frequency for optical sensors in industrial cutting environments]
- Physical Inspection of the Laser Module: Check for loose mounting screws. Vibration from the oscillating knife motor can loosen fittings over time. Ensure the laser module is securely fastened and aligned parallel to the knife holder.
- Software Zero-Point Verification: Access the control software. Initiate the auto-focus test routine. The machine will lower the head until the laser detects the surface. Compare this reading with a known reference.
- Z-Axis Offset Adjustment: If the detected height differs from the actual height, adjust the Z-axis offset parameter in the software. This compensates for any mechanical wear or sensor drift.
A common mistake is assuming that visual inspection is sufficient. Operators often look at the laser dot on the material and assume it is focused. However, the auto-focus system relies on triangulation or confocal measurement, not just the visibility of the dot. Using a calibrated gauge block is necessary to detect sub-millimeter deviations that the eye cannot see.
How to Verify Calibration Accuracy with Test Cuts?
Verification is the proof of calibration. After adjusting the parameters, you must validate the results with physical test cuts. This step bridges the gap between digital settings and physical reality.
Select a standard test material. Acrylic sheets or uniform cardboard are ideal because they have consistent thickness and provide clear visual feedback on cut quality. Avoid using irregular scraps for verification.
- Prepare the Test File: Load a simple geometric shape, such as a square or circle, with a known dimension. Include both straight lines and curves to test dynamic response.
- Execute the Cut: Run the job at standard speed and pressure settings. Do not use aggressive speeds that might mask focus issues through sheer force.
- Measure the Results: Use calipers to measure the cut dimensions. Check for perpendicularity. Inspect the edge under magnification if possible.
- Check for Burr Formation: On materials like EVA or rubber, look for any signs of tearing or burring at the bottom edge. This indicates the knife did not fully penetrate or dragged due to incorrect depth.
[NEED_CITE: standard test methods for verifying CNC cutting precision]
At Realtop Machinery, we implement a pre-shipment video verification protocol. Before any machine leaves our facility in Jinan, we perform these test cuts and record the process. This video is sent to the customer, providing a baseline for future comparisons. If a customer experiences issues later, they can replicate the test and compare their results to the original video. This practice eliminates guesswork and ensures that any deviation is identified as a maintenance issue rather than a manufacturing defect.
Common Calibration Errors and Troubleshooting Tips
Even with a clear procedure, errors occur. Understanding the root causes helps in faster troubleshooting.
- Vibration-Induced Drift: As noted earlier, transport and heavy usage cause mechanical shifts. If precision drops after moving the machine or after a period of intense production, recalibrate immediately. Do not wait for visible defects.
- Sensor Contamination: In textile and leather cutting, airborne fibers are pervasive. These settle on the sensor lens quickly. Establish a daily cleaning routine. A dirty sensor is the most common cause of sudden focus errors.
- Software Glitches: Occasionally, control software may retain old offset values after an update or crash. Resetting the Z-axis parameters to default and re-calibrating can resolve these anomalies.
- Incorrect Material Settings: Sometimes the laser is calibrated correctly, but the material profile in the software is wrong. Ensure the material thickness and type settings match the actual stock being used.
[NEED_CITE: common causes of sensor error in industrial laser systems]
A leather goods factory we worked with faced inconsistency in multi-layer cutting. They suspected the laser was faulty. Upon investigation, we found that the operator had not cleaned the lens for weeks, and the material settings were configured for single-layer leather instead of multi-layer stacks. Implementing a daily laser check routine and training staff on material profiles resolved the issue without any hardware replacement.
When Should You Recalibrate Your Laser Head?
Knowing when to calibrate is as important as knowing how. Adhering to Auto-Focus Laser Head Calibration Standards requires a proactive schedule rather than a reactive one.
- After Shipping or Relocation: Any time the machine is moved, especially over long distances, recalibration is mandatory.
- After Maintenance: If you replace the oscillating knife, the tool holder, or any Z-axis components, the alignment may have shifted.
- Upon Precision Drop: If you notice a decrease in cut quality, such as increased burrs or dimensional inaccuracies, perform a calibration check immediately.
- Regular Intervals: Based on machine usage hours, establish a routine. For high-volume operations, a weekly check is advisable. For lighter use, a monthly check may suffice.
Treating calibration as a routine maintenance task, rather than a troubleshooting step, ensures consistent performance. It prevents the small drifts that lead to large wastes.
Conclusion
Auto-focus laser calibration is not a one-time setup but a continuous maintenance requirement for high-precision CNC cutting.
By following established Auto-Focus Laser Head Calibration Standards, operators can maintain ±0.1mm accuracy, reduce material waste, and extend tool life. Regular cleaning, verification with test cuts, and timely adjustments ensure that your machine performs consistently, regardless of the material or production volume.

